::Wings::
| This is the second time I've drawn wings, and the first time I do them realistically, so, since I was going to go through the process, I thought, why not make a tutorial while I'm at it. It's isn't so much a tutorial as it is an explanation of the process I did when making the wings. If you find it helpful, then all the better. However, this tutorial is a bit more advanced than my other ones, and there are several things that you will need in order to acheive the same results.
First, you'll need a graphic program that supports layers. It can be done without layers, but if a mistake is made, it's easier to have layers so we don't ruin the whole thing. Second, you'll need a graphic program that has an airbrush/paintbrush tool. This is very important, because this is what we will use to shade. The pencil tool will only be used to draw the outline. Third, you need a smudge tool. Also very important. I use Photoshop 7, but Photoshop 5 and 6 can be used as well... this could be done in PSP, but I wouldn't know. Let me know if it works for PSP as well. |
||
 |
 |
 |
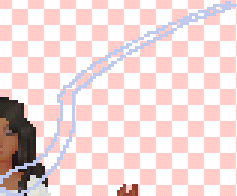
| 1.Adding wings should be one of the last steps you do, on a nearly completed doll, creat a new layer (shift+ctrl+n) and call it wings.
Draw the bone structure that holds the wing in place using the pencil tool at 1px in size. Look at pictures of birds if you need a good reference. Don't worry if the pixels are all out of whack and messy, that's not important. |
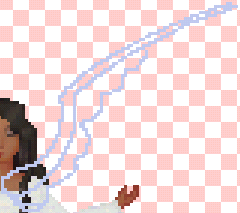
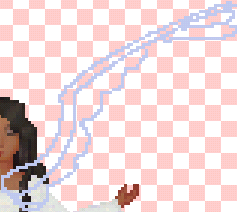
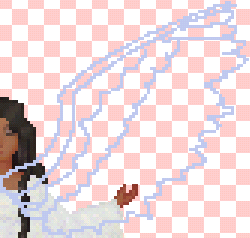
2.Draw some semi-circle-like shape like I have done above, this is the underside of the wing. | 3. Draw the two top feathers. Once again, don't worry about the messy look of the pixels, it's not important. |
 |
 |
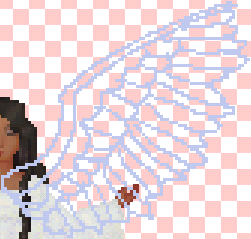 |
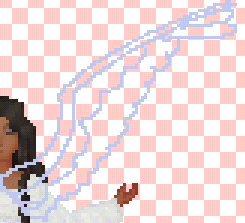
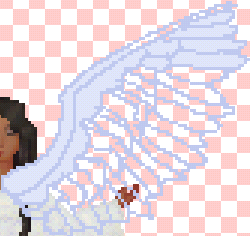
| 4.Draw even more circle-shape thingies. Remembre to follow the picture example if your shapes aren't coming out right. | 5.To complete the basic shape of the wing, draw a squiggly broken-ish shape like the one above. This will be the feathers, believe it or not. | 6. To make the wing look like a wing, we need to add seperate feathers, no? Still using the pencil tool at 1px in size, draw in the feathers. Just connect the lines like if you were drawing clothing folds. Follow the picture if my explanation makes no sense. |
 |
 |
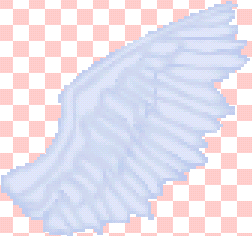 |
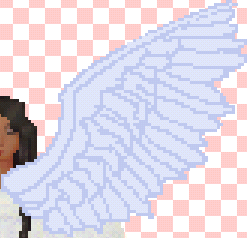
| 7.You might notice that the structure looks different here, that's because I decided that the middle line of feathers was too short, and decided to make them longer. Either way, now we need to fill in the wings with a color that is lighter than our outline color. | 8.Use the paintbucket to fill in the spaces. Make sure that all the pixels are connected, and that anti-aliased is clicked OFF in the options toolbar for the paintbucket. If the paint bucket misses some areas, fill them in with the pencil tool. | 9.Make a new layer and call it Wing Shading. On this same layer, take the smudge tool, set your opacity to about 30% (it's up to you) and smudge the pencil lines like I have done. It's beginning to look like a wing, eh? You can leave it like this is you are satified, but if you want a truely realistic wing, move on! |
 |
 |
 |
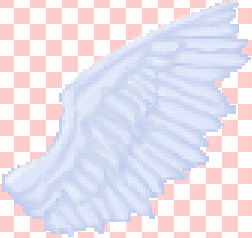
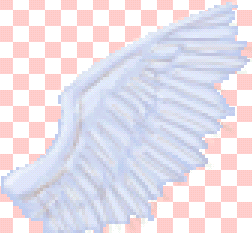
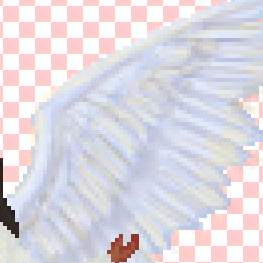
| 10. It's because of the parts that follow that I call this an advanced tutorial. It requires a solid understanding of the play of shadows and light, as well as color composition and so forth. Using the paintbrush tool set to an opacity level of about 20% I have begun shading the wing. Here I have used some white to give very subtle highlights. | 11.Since we are using blue tones to shade this wing, we create the shadows using a medium to dark orange. Not to dark, and not too orangy either. Why orange? Because orange is blue's complenetary color, and in nature, that is how shadows and lights fall. Put in shadows were shadows would fall, like underneath the wings and so forth. Also draw light random strokes 1 px in size across the feathers to give the illusion of depth and make them look more feathery. | 12. Continue on with the same technique. Use the smudge tool sparingly, only to fix areas. Use the paintbrush at a low opacity to create the shadows and give depth. Just keep on drawing random strokes, remember that all the strokes are 1 to 2 pixels in size. The smaller the better. Smudge where needed to give it a softer look, but no more! |
 |
 |
|
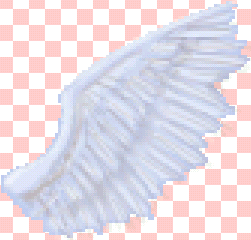
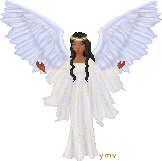
| 13.I have used a very light yellow to give some highlights. I did this on a new layer, just in case I messed it up. I also used a very low opacity, and kept the paintbrush to 1 pixel in size. Paint the lights in places where light would fall, like the top of the bone structure, and on the wings that are at the top. | 14.To finish, duplicate the wing layer (Layer-->Duplicate, then go to Edit-->Transform-->Flip Horizontal and move the wing into position. Once it's in position, merge both wing layers (ctrl-e or Layers-->Merge Down or hide all the other layers, and then click on Merge Visible. Whatever you do, don't flatten the image!) and place the wings layer behind all your other layers. In other words, drag it down to the bottom of the list. Your doll should be on top. Add accesories or whatever, and you are done! | |