| This tutorial was originaly written by Amy Roberts for PaintShop Pro. With her permission I have "translated" it for use with Photoshop. If you are a PaintShop Pro user, please check out her original tutorial here. This tutorial will cover how I use Amy's original technique to make a silk doll dress in Photoshop, it's a little bit different from Amy's original tutorial, but I hope you still find it useful and like the end result. I have edited this tutorial assuming that you know your way around Photoshop, if you don't know your tools very well, please red my Photoshop Crash Course tutorial first. |
||

|
         |
|
|
1. Open the base you want to use. For this tutorial we will be using one of Amy's "Mina" bases. You can use the one provided here or download one from her site.
Create a new layer named Dress. Use the Pencil tool with a size of 1. |
2.Amy has created some color palletes that you can use, or you can make your own. She has numbered them so it is easier to understand the tutorial. For this tutorial, let's pick the aqua color right between the blue and the green. |
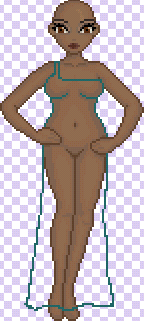
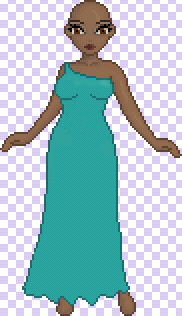
3. Choose the number one colour of the palette and draw the outline of the dress. It always helps to Zoom in on the image while you do this. Don't worry if it's a bit messy, we'll clean it up in the next step. |

 before after |
|
|
|
4. Choose the Eraser tool and set the size to 1. Zoom in on your image and erase any extra pixels - you want the dress to be 1 pixel think at all points. Also make sure that the lines of the dress are smooth, get rid of any ugly bumps by deleting and redrawing sections. Important: Make sure that your eraser options are set to Pencil and that the Opacity is 100%. This way you'll get a nice solid eraser block, instead of the airbrush that will erase parts of the pixels around the area you want to erase and not just the area you want to erase. You can increase the size if you want to erase bigger areas. |
5.You'll notice that I have changed several things, this is because I wasn't happy with the results I was getting so I decided to change the base, change the way the dress falls and fix the top of the dress where the shoulders are. If you are happy with your results, then there is no need to change anything. Now, select the number 2 colour from your palette use it to color in the areas around the hands that were not outline with the dark color. If you did outline them with the dark color, then you don't need to worry about them. Use the Paint bucket toolto flood fill the interior of your dress. Important: Make sure that your Paint Bucket options are set to Normal, that the Opacity is 100%, and that the little box that says contiguous is checked and the one that says Use all layers is not checked. This is very important so that you don't end up with this instead of this. |
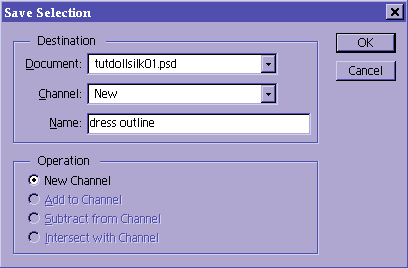
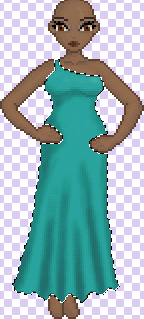
6. Click on the Magic Wand tool. Click on the area outside of the dress. When this is selected, go to Select-->Save Selection. Makre sure that New Channel is chosen from the drop down menu, and type in dress outline in the name bar. Click Ok or hit the Enter key. This is will save the selection and we won't have to keep selecting it again. Hit the ctrl and the d at the same time to deselect. You can also go to Select-->Deselect but this takes longer. |
|

|
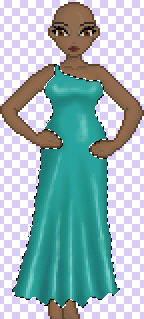
|
|
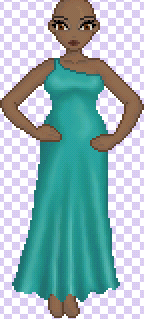
7. Ok, more confusion... we're back to the old base because the truth is I changed the base after I had finished the doll. Anyways, that's not really important since you are supposed to create this look in any base. Create a New Layer (shift + ctrl + n) and name it Dress Shading. Select colour 1 from the palette again and draw on your dress where the shading would be. Don't worry if it goes over the line, this makes it look more natural. Note:I'm using the Airbrush tool for this, between size 3 and 5. You can also use a hard brush (the ones at the top of the brush pallete) or a soft brush (the rest of the brushes). To change the size/hardness of any brush in Photoshop, except for the texture brushes, just double click on the desired brush. Where it says Diameter is where you change the size, Hardness is where you change how hard your brush will be (0% is very hard, like an acrylic/oil paintbrush, 100% is very soft, like a watercolor brush). The Spacing, Angle and Roundness should be set to the defaults which are: 25%, 0% and 100%. |
8.Pick up your smudge brush and start smudging up and down! If you're hesitant to use the smudge brush, don't be, this is one of the tools Photoshop excels at. Keep smuding until you are satisfied with the result. |
9.Click on the outside of the dress area on the dress outline layer with the the magic wand tool and switch back to the Dress shade layer then hit the delete (or del) key on your keyboard. This takes away any excess color that you don't want outside the dress.
Now create a new layer and call it Dress lighting or something equally descriptive. Take the #3 color and put in some highlights with the airbrush. Here my brush was set to a small size, between 1 and 2 pixels. |
|

| k
|
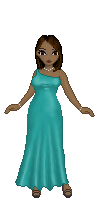
| 10. Now smudge with the smudge brush using up and down strokes, like we did with the shading. | 11. This is what your doll should look like. I have done even more smudging and added in some more bits of light and shadow using the airbrush. Just use your best judgement. | 12.And you're done! Add in some more details, like the hair, shoes and any accesories you want her to have on. You'll notice that here is where I changed the base because the flow of the dress did not go with the position of the base. This may not seem important to you, but acheiving a realistic as possible look makes for a better looking doll. |
| Your doll is complete! You can use this technique for a wide range of outfits, from skirts to shirts and trousers. | ||
| << back to tutorials | ||